
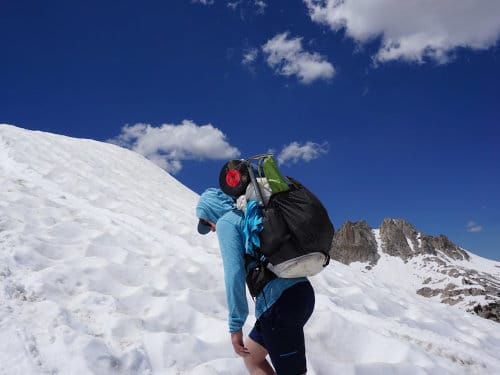
On my first backpacking trip, I had no idea what I was doing. A friend and I had one real backpack between us (the other was an overstuffed daypack), a kitchen saucepan (paired with a tiny borrowed backpacking stove), some giant sleeping bags, and many redundant emergency items, among other (useless) things. I didn’t do much research and what real gear I did have was borrowed.
I’ll say right now that it was an amazing trip. We hiked into a pristine alpine lake north of my hometown and it’s an experience I’ll remember forever, even with the abundant gear issues. But, if I had a little advice (and/or any forethought) I could have made that trip a lot more comfortable and enjoyable.
That brings me to Part 2 of my Wilderness Backpacking for Beginners series; What to Bring on Your First Backpacking Trip. In this post I’ll go over gear philosophy, essential items, and a full, comprehensive checklist to get you started.
Note: As an Amazon associate I earn from qualifying purchases. If you click through one of the links on this page and make a purchase, we receive a small commission at no extra cost to you. It helps keep us up and running and able to continue to provide great content. 🙂
Gear philosophy: The ten essentials
The Ten Essentials are just that; the ten things you should always have with you on any backcountry excursion. There’s a classic list, which is pretty specific (eg. “Map”), and a modern list, which is more broad (eg. “Navigation’). Mountaineers.org does an amazing job thoroughly breaking down every item, but I’ll give you the quick modern version here.
- Navigation - Map and compass at least, GPS optional
- Light - headlamp or flashlight with extra batteries
- Sun protection - sunscreen and sunglasses minimum, UV protective clothing optional
- First aid - a small backpacking first aid kit is good, plus insect repellent, ibuprofen, and foot care
- Knife - totally up to your preference, but multitools with at least one knife are great
- Fire - What you bring depends on how you intend to use it. Could be matches, lighter, firesteel, etc. plus some type of tinder
- Shelter - usually a tent, but could be just an emergency bivy sack or tarp
- Food - bring extra
- Water - bring extra or, better yet, have means to purify it
- Clothes - Bring warmer clothes than you think you’ll need
These are the most essential items you need on every trip. Everything else can be considered extra, although you’ll basically always want the extra stuff. A sleeping bag and sleeping pad aren’t specifically listed here, for example, but you’ll probably want those almost always. Plus toiletries, pillow, fishing pole, bear spray, and whatever else will make your trip more enjoyable.
So now that you know what you need, here’s how that translates to what you’ll probably want. I have a checklist right below, and I have a complete breakdown below that to help you decide exactly what to take.
Beginners Backpacking Checklist
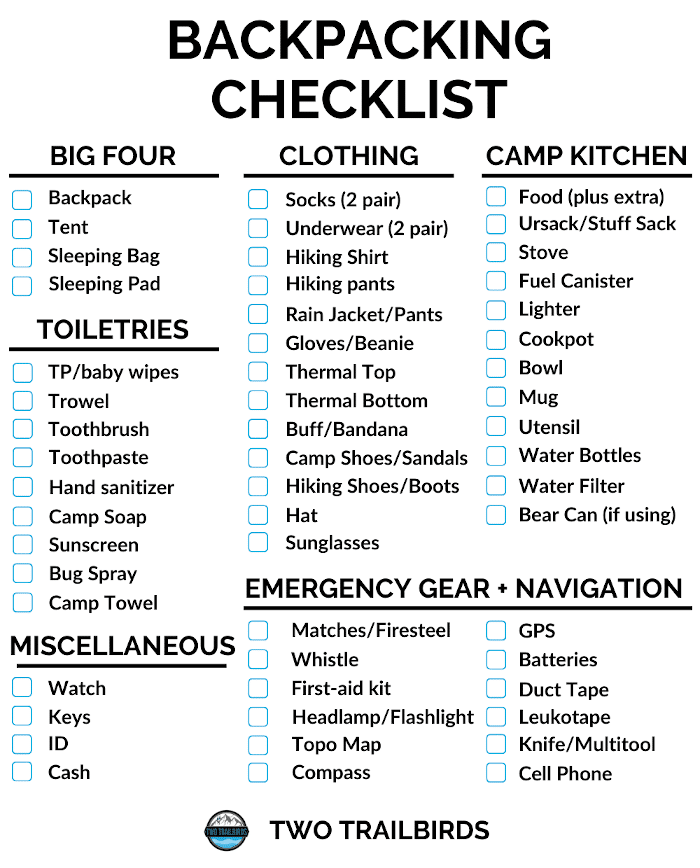
This is a general checklist to help you in planning, but read on for explanations and help deciding exactly what to bring.
*A note on where to get all the gear*:
Backpacking gear needs to be a lot more compact than car camping gear, so even if you have some camping stuff, it’s unlikely you’ll be able to use much of it for backpacking. For any gear you don’t have, I highly recommend borrowing. That way you can start to get a feel for what you like in your gear before you buy. If you don’t know anyone you can borrow from, many outdoor retailers (like REI) offer very affordable rental services for many backpacking gear items.
I’ll also list some (relative) budget examples of the items listed here if you’re looking to buy new. Just remember that good backpacking gear is an investment, so even this budget stuff isn't exactly cheap. You can certainly find cheaper options (no judgement of thrift shopping here), but I'm only comfortable recommending what I'm familiar with. If you want to see what my current kit looks like check out my John Muir Trail Gear List.
The Big Four
The Big Four are called the big four because they generally will be the four bulkiest and heaviest items you bring, and you’ll need them all on every trip. They are your backpack, tent, sleeping bag, and sleeping pad.
Backpack
Backpacking backpacks are very different from run-of-the-mill daypacks and bags. Because they need to carry heavier loads, they usually have thick padded hip belts and some sort of rigid frame connected to them. This helps to transfer most of the weight onto your hips rather than your shoulders, allowing you to carry the weight for longer periods. Frame systems differ, but most new backpacks these days have internal frames.
When deciding on a backpack, you really need to be able to try it on with some weight in it. If you’re renting, the store should help you get a pack that fits you and have you wear it with some weight to test for comfort.
If you’re borrowing gear you take what you can get, so whatever pack you go with may not be a perfect fit. Just make sure that you test it out with some weight first and don’t plan on using it if there are any glaring issues (pinch points, scratching, too big/small, etc.).
If you plan to buy, I don’t recommend trying to go ultralight right off the bat. Just get something big enough (60-70 liters) that feels comfortable and has an internal frame and go with it. REI packs are great budget options and you pretty much can’t go wrong with Osprey.
Budget Pick: Gregory Stout 65

MSRP: $189 USD
Backpacks are expensive, but spending money on a good one is well worth it. You can certainly find packs for less than $100, but my experience with packs that cheap has been... bad (shoulder blisters, back and neck pain, etc.). That's why I'm recommending the Stout 65, which is super comfortable and has a lot of features for the price. And at 65 liters, it has enough capacity for beginner gear.
Tent
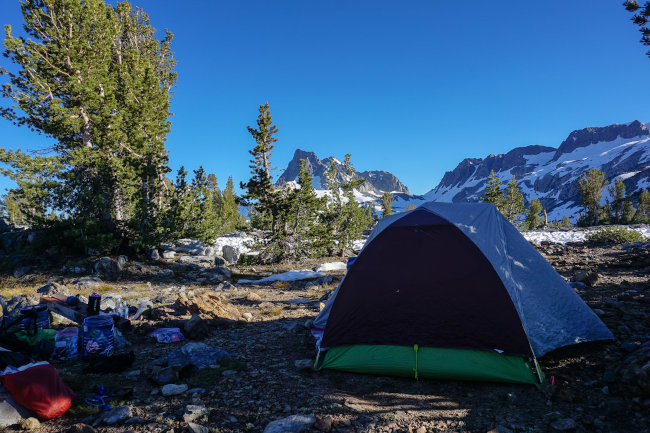
For beginners, backpacking tents are more or less smaller versions of the camping tents you’re probably already familiar with. They’ll have an enclosed mesh inner that’s supported by curved poles, and a rainfly that clips over the top of that. Today’s tents are really user friendly, and for entry level options you don’t really need to worry about details.
The only consideration you really need to worry about here is size. If you’re going with a friend, a 2-person tent can be a good idea because you'll save a lot of weight over two 1-person tents. Be aware that space in backpacking tents is tight though, so if sharing sleeping space is an issue for you then 1-person tents work fine as well.
Budget Pick: REI Co-Op Trail Hut 2
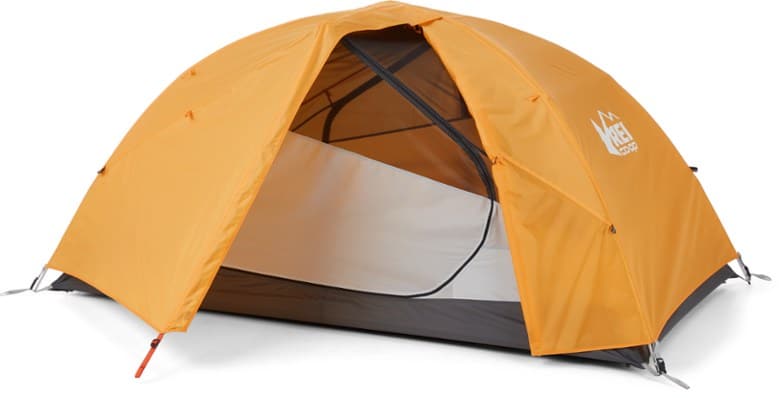
MSRP: $199
There are a lot of tents in this price range, but REI is a reliable company and this is a great tent, so it's the one I'm going with. I'm recommending a 2-person tent because in general they're so much more versatile than 1-person tents, but if you really want to go smaller REI also offers the Passage 1.
(The Alps Mountaineering Lynx 2 is also a great tent, and is on sale on Amazon right now for $155)
Sleeping Bag
There are a lot of ways to get lost in the sleeping bag world. Quilts vs. bags, down vs. synthetic, size/length, with hood or without, and temperature rating. For your first trip, you really only need to worry about two things:
- Size - make sure it’s big enough for you (too big isn’t as much of a problem, especially if borrowing)
- Temperature rating - needs to match the conditions you’ll be in. If nighttime temps are expected to be in the 40’s, go with a bag that’s rated to 30 degrees or lower.
If you’re buying, get a sleeping bag that’s sized right for you. As far as temperature rating, I’d recommend buying a fairly low-temp bag. This will make it heavier, but it’ll be much more versatile. My first bag was rated to 15 degrees, which worked great for every trip I went on that year. I think somewhere around 20 degrees is probably the sweet spot for a first sleeping bag, but if you’ll mostly be backpacking in low elevation, warm weather areas you might be okay to go with 30 degrees or even warmer..
Budget Pick: Kelty Cosmic 20

MSRP: $169 USD (frequent sales/coupons)
I'm recommending the Cosmic 20 bag because at 2 lbs 10 oz, it's one of the lightest synthetic sleeping bags for the price. Plus this is just a great all around sleeping bag. It's plenty warm and it has a stash pocket, full hood and draft collar, and great packability.
Sleeping Pad
There are also a lot of options when it comes to sleeping pads. The two big considerations here are comfort level and R-value (a measure of insulation, which is important for keeping you warm when the ground is cold).
For comfort, you’re mostly choosing between inflatable pads (mini air mattresses; most comfortable), closed cell foam pads (more like thin mats; least comfortable), and self-inflating pads (kind of in between). It helps to have some experience sleeping on the ground to choose here, but if you have no idea I’d recommend an inflatable mattress as your first one. They’re a little more expensive, but on average much more comfortable.
For R-value, anything from 1-3 is fine for summer trips. 3-5 is enough for 3-season trips, and anything above that is really only necessary for winter.
Budget Pick: Klymit Static V

MSRP: $55 USD (nearly always on sale)
I think for an inflatable pad, the Static V (and the rest of the Static V lineup) is far and away the best beginner/budget option. It's super comfy, only weighs 18oz, and at an R-value of 1.3 will be good for most summer trips. And, for a little extra money and weight, you can get an insulated version (R-value; 4.4) which will keep you warm year round.
Clothing
Clothing is fairly straightforward. For your first trip you don’t need to go out and buy anything super technical, but for anything you’ll be wearing while hiking avoid cotton at all costs. There are much better options (see here for details) that wick moisture, breathe better, and insulate when wet. Most athletic shirts, shorts, socks and underwear are made out of some kind of moisture-wicking fabric, so if you already have any of that you’re good to go. Otherwise, you can get cheap Nike Dri-fit clothes or similar at most sporting goods or general clothing stores, and Costco's 32 Degrees brand has good baselayers, tees, and underwear for cheap (get it on Amazon also).
Always make sure to bring enough clothing for conditions, and then some. Even in summer, that usually means all of these things.
- Underwear (2 pairs)
- Socks (2 pairs; Merino wool is best)
- One hiking t-shirt
- One pair of hiking shorts or pants
- One fleece or insulated pullover jacket
- Rain jacket or poncho
- Thermal underwear (top and bottom, for sleeping and camp)
- Sunglasses
Some other optional items include a buff, baseball cap or sun hat, gloves, beanie, puffy jacket, and rain pants. I personally bring my puffy jacket everywhere because it always gets cold enough in the mountains to want it, but it may not be necessary for you. Just make sure you know what the conditions are expected to be and bring a warmer set of clothes than you think you’ll need.
Shoes are also part of the clothing category. For any maintained trail, trail runners will be more than fine. I use trail runners (Altra Lone Peaks or Timps) for anything other than off-trail trekking or bushwhacking (for that I wear La Sportiva Bushido II's) . You may also want to bring sandals to wear as camp shoes and/or for crossing streams. I often just bring a cheap Wal-mart pair of flip-flops.
Camp Kitchen
Camp kitchen is one area where people’s preferences vary wildly. There are tons of different stoves, cookpots, and fuel systems and they all have their merits. What you take on your first trip will depend a lot on what happens to be available to you.
For that reason, I won’t go into different setup types. I’ve just made a basic list that will apply to most people, and your REI rental specialist or friend who is lending you the stuff can help you with the specifics.
You’ll need;
- Stove
- Fuel Canister
- Lighter
- Cookpot
- Dishes (bowl, cup/mug, eating utensil)
This will be enough to boil water for freeze-dried meals as well as cook basic one pot backpacking dinners. If you want an all-in-one setup and are okay with a little extra weight and cost, grab a Jetboil Flash. They boil water super quick and are really easy to use.
Food
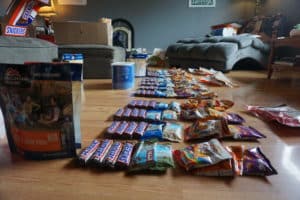
I wrote a whole post on the basics of backcountry nutrition, which outlined nutrient needs and ways to estimate how many calories you need for different scenarios. For an in-depth look you should check it out, but for your first overnight trip it’s really pretty basic. Here’s an outline, just make sure as always to bring more than you think you’ll need.
- One Breakfast - instant oatmeal, pop tarts, or granola bar
- Two Lunches - tastes vary a lot but I like things like jerky, hard cheeses, dried fruit, flavored tuna packets, and chips. Read more on my favorite no-cook lunches here.
- One Dinner - I’m partial to Mountain House freeze dried meals (check out my favorites here). They’re easy and tasty, but there are other options including ramen (I also have a post about my favorite gourmet ramen recipes) and instant rice/pasta sides.
- Some snacks - Snacks are for when you feel hungry but don’t really need to sit down for a meal. Good options are trail mix (classic), dried fruits, protein bars (candy bars are also encouraged), nuts, or nut butters.
That’s really all you need for an overnight trip. My biggest advice here is to bring food you already know you like, and it’s okay for it to not be all that healthy. I’ve made the mistake more than once of bringing “hiker food” that I didn’t like at home, thinking that somehow my tastes would change when I got out there. While that actually can be true after weeks on trail (hiker hunger is real), it isn’t on short trips, so stick with what you like.
Water
Depending on where you go, you probably don’t need to actually bring “water,” except for what you’ll leave the car with. What you need to bring is a system for storing water and treating it to make it drinkable. I wrote a whole post about my favorite hydration system here, but here’s an easy list.
- Two water bottles or bladders - smart water bottles or CNOC Vecto bladders are great
- One lightweight filter - Sawyer Squeeze or Micro Squeeze (full review here) are good, just make sure its compatible with your bottles before leaving
- Backup method - if you have a stove this could be as simple as boiling. You could also bring Aquamira tablets or iodine drops.
My basic method is to have one designated “dirty” water bottle or bag that I fill from the source, then filter into the “clean” bottle or bag. It’s simple and easy, which is best when you’re just starting out.
Navigation
Even if you’re on a trail you think you know well, you should always have some basic navigation tools just in case.
- Paper topo maps
- Compass
In addition to having these items, it’s important to know how to use them. Taking an orienteering class (REI offers them) is the best way to learn, but you can take a look at the basics here.
Some other optional items include guidebooks/route descriptions, GPS units, personal locator beacons, or GPS watches. I often bring my Garmin Inreach Mini for emergency communication and navigation, and my Fitbit Ionic for activity tracking.
Camp Bathroom and Hygiene
For this part, you mostly already know what you need to bring. Whatever hygiene items you use daily are what you’ll need to take backpacking. Here’s a list of some common items, plus the couple that you might not think of.
- TP/baby wipes
- Trowel (for cathole digging)
- Toothbrush and toothpaste
- Prescription meds
- Hand sanitizer
- Contacts and solution
- Plastic bags for garbage (and TP)
- Camp soap (Dr. Bronners is my favorite)
- Sunscreen
- Bug spray
- Camp towel
With backcountry hygiene stuff especially, always follow Leave No Trace principles. Pack it in, pack it out.
Emergency Gear
On any backcountry trip, it’s important to have emergency supplies. These will keep you safe and healthy in case of any problems, such as injury, getting lost, or severe weather.
- Matches/lighter
- Safety whistle (many backpacks have them built in to the chest strap)
- Extra batteries if using
- First aid kit (Adventure Medical Kits are good intro options)
- Foot care kit (moleskin and leukotape)
- Duct tape (for gear repairs)
- Knife or multitool
As you gain experience, it'll also be useful to practice emergency skills such as signaling, starting a fire with flint, and emergency first aid.
The Rest
The rest of this stuff doesn’t really have a category, but you’ll often need it.
- Bear canister or Ursack (don’t hang your food, please)
- Bear spray (if allowed) (read more about hiking in bear country)
- Phone
- ID
- Cash
- Keys (very important)
- Permits
And then some “luxury” items you might want for extra enjoyment;
- Journal (I like Rite in the Rain)
- Camera
- Fishing pole + tackle
- Small daypack (for short day trips or summiting peaks)
- Book/kindle
- Cards/dice/cribbage board
- Backpacking camp chair
These extras can add weight quickly if you’re not careful, so be a little choosy about how much you’re bringing. It also helps to check your total pack weight before you go to help you decide what you really need.
It seems like a lot to put on your back, but a lot of it is pretty small stuff. The key is keeping it all organized by category, either in stuff sacks or plastic bags. Understand, though, that for your first trip you can expect a heavy pack. It sucks at times, but it’s just a part of backpacker initiation and we all have to go through it at some point. If you enjoy your first trip enough to go on a second (which I’m sure you will), you’ll start to figure out how to lighten your load and stay more organized with the experience (which I also wrote a separate post on).
And because you’ll be bringing a heavy pack with a bunch of unfamiliar gear, it’s important to choose a reasonable trail as your first overnight trip. In my next post in the series, I’ll show you how to do just that.
Anything I missed or think I should add? Let me know in the comments!
Note: As an Amazon associate I earn from qualifying purchases. If you click through one of the links on this page and make a purchase, we receive a small commission at no extra cost to you. It helps keep us up and running and able to continue to provide great content. 🙂